Speed Is Everything
The single most important factor in catch-and-release survival is how fast you get the fish back in the water. A properly handled fish that's unhooked and released within 30 seconds has a 95-98% survival rate. A fish kept out of water for 3+ minutes while you fumble with pliers drops dramatically.
The golden rule: if you can't get the hook out in 15 seconds, cut the line. The fish will dissolve or reject the hook naturally over days to weeks. A fish swimming away with a hook in its mouth has a much better chance than a fish that's been handled and stressed for 2 minutes while you try to dig out a deeply embedded hook.
Before You Start — Preparation Makes It Easy
Have your tools ready before you hook a fish. The worst time to search your tackle box for pliers is when a fish is flopping on the dock.
Essential tools: Needle-nose pliers or forceps (hemostats). These are $5-$10 at any tackle shop. Attach them to your vest, belt loop, or tackle box with a lanyard. Having them within arm's reach is the difference between a 10-second release and a 60-second struggle.
Optional but very helpful: A rubber-mesh landing net (much gentler on fish than knotted nylon nets). A wet towel or wet gloves for handling (dry hands strip the fish's protective slime coat). A hook remover tool (a plastic T-shaped device that slides down the line and pops hooks free — excellent for deep hooks).
Wet your hands before touching any fish. Your dry hands remove the mucus layer that protects fish from infection and disease. A quick dip in the water takes one second.
Standard Hook Removal — The 10-Second Method
This is for fish hooked in the lip or corner of the mouth — which is where 80%+ of properly caught fish end up.
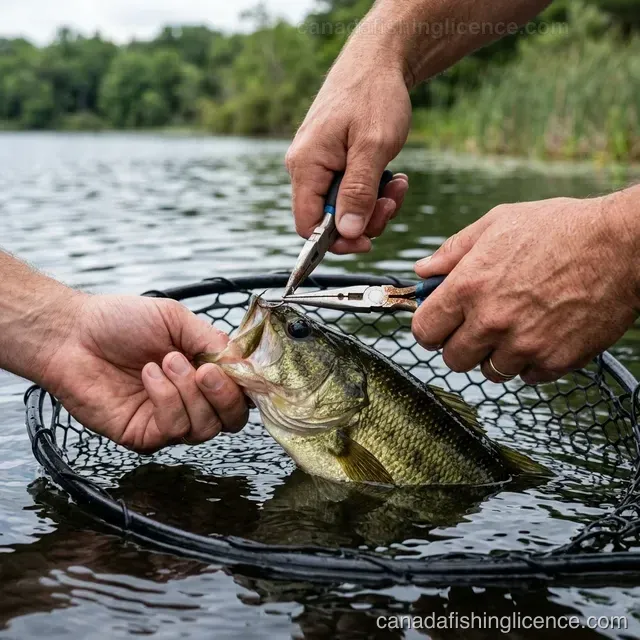
Step 1: Keep the fish in or just above the water. If it's a small fish (under 30 cm), you can hold it gently but firmly with one wet hand around its body. If it's larger, keep it in the net in the water while you work.
Step 2: Grip the hook shank (the straight part, not the point) with your pliers.
Step 3: Rotate the hook back the way it went in — not straight out, but following the curve of the hook. A slight twisting motion while pulling back usually pops it free instantly.
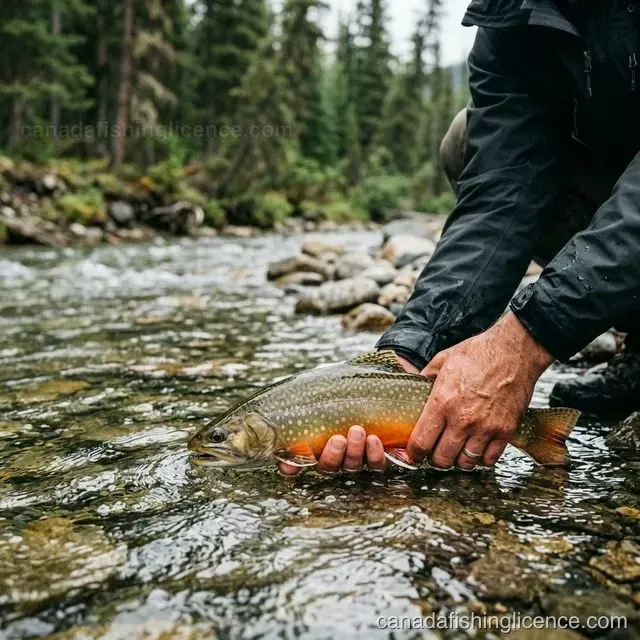
Step 4: Release the fish into the water, facing into the current if you're in a river. Hold it gently until it swims away under its own power. Don't throw it.
Total time: 5-10 seconds for a lip-hooked fish. If you practice this once, it becomes automatic.
What to Do When the Hook Is Deep (the "Gut Hook")
A deep-hooked fish means the hook is in the throat, gills, or stomach. This usually happens when using live bait and the fish swallowed the bait before you set the hook. Here's the critical decision:
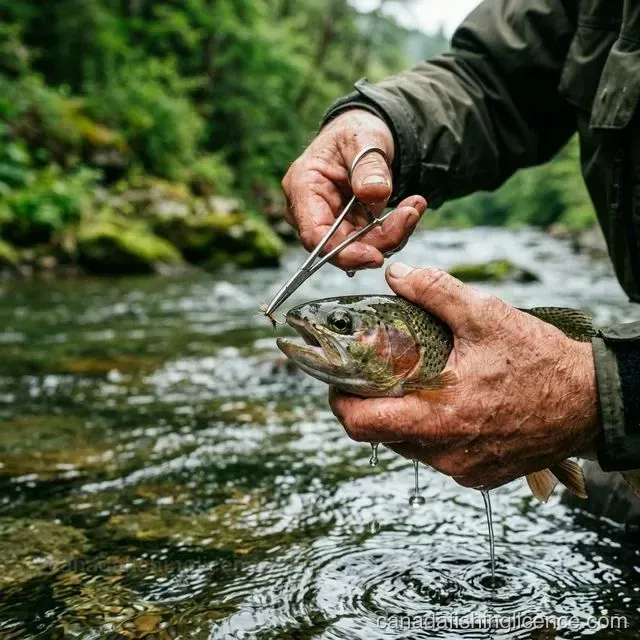
If the hook is visible and accessible (you can see it in the back of the mouth): Use long needle-nose pliers or a hook remover tool. Grip the hook shank and rotate it free. This works for throat hooks where you can still see metal.
If the hook is NOT visible or you can see it's near the gills: DO NOT try to pull it out. Pulling a hook through or near the gills is almost always fatal. Instead:
Cut the line as close to the hook as possible. Use scissors or line clippers to cut the line right at the hook eye. Push the remaining line into the fish's mouth so nothing trails out. The fish will dissolve or reject the hook within 1-3 weeks (monofilament dissolves; steel hooks rust). Studies show that fish with cut hooks have a 90%+ survival rate, compared to under 50% for fish where someone tried to wrench out a deep hook.
If the fish is bleeding from the gills: This is serious, and the fish may not survive regardless. If regulations allow, consider keeping this fish as part of your catch limit. A gill-bleeding fish released into the water has a poor survival rate — keeping it avoids wasting the fish.
Prevention: Set the hook sooner. When bait fishing, don't wait too long after a bite. A quick hook-set when the bobber first goes under usually hooks the fish in the lip, not the throat.
Barbless Hooks — Why They're Worth It
Barbless hooks are required by law in many Canadian waters — all National Parks, many BC waters, most fly-fishing-only zones, and specific regulations across provinces. But even where they're not required, many experienced anglers choose them because:
Removal takes 2 seconds. Without the barb, the hook slides out with a gentle twist. No pliers needed for lip-hooked fish. The difference in release speed is dramatic.
Survival rates are higher. Studies consistently show barbless hooks cause less tissue damage, less bleeding, and faster recovery compared to barbed hooks.
You lose slightly more fish. This is the trade-off — maybe 10-15% more fish come off during the fight. But most anglers find they lose fewer than expected once they adjust their technique (keep steady pressure, don't give slack).
How to make barbed hooks barbless: Pinch the barb flat with pliers. Takes 3 seconds per hook. The hook still holds fish well — the barb isn't what keeps the hook in during a fight; that's the hook shape and your line tension.
Where barbless is mandatory: All Canadian National Parks, many BC streams and rivers (check specific regulations), Ontario's catch-and-release-only zones, and Alberta's Eastern Slopes trout streams. When in doubt, go barbless — you can't be fined for using barbless hooks where barbed hooks are allowed.
Handling Fish Properly
Good hook removal means nothing if you damage the fish while handling it:
Wet your hands. Always. Every time. Dry hands strip the protective slime coat that prevents infection.
Don't squeeze. Support the fish; don't grip it. For small fish, cradle it loosely in one wet hand. For large fish in a net, work on the hook while the fish stays in the water.
Avoid touching the gills. Gills are the fish's lungs — damage to gills is often fatal. Never grab a fish by the gills or stick your fingers in the gill openings.
Minimize air time. Imagine holding your breath — that's what the fish is doing out of water. Aim for under 15 seconds of air exposure. If you want a photo, have the camera ready BEFORE you lift the fish.
The photo rule: "Camera ready, fish up, 3 seconds, fish back." Don't hold a fish in the air while your friend finds their phone, opens the camera app, and takes 6 photos. That 30-second process can turn a healthy release into a dead fish.
Hold properly for photos: Support the belly with one hand, hold the tail area with the other. Never hold a fish vertically by the jaw — the weight of the body can damage the jaw structure. Hold horizontally, close to the water, and return immediately.
Different Hook Types and What to Know
Single hooks (standard): Easiest to remove. One point, one barb. The Improved Clinch removal method works perfectly.
Treble hooks (on lures): Three hooks in one — these are harder to remove because multiple points can embed. Use pliers carefully, removing one hook at a time. Consider replacing treble hooks on your lures with single hooks (many catch-and-release anglers do this).
Circle hooks: Designed to hook fish in the corner of the mouth — which makes removal easy and dramatically reduces deep-hooking. Required for some species in some jurisdictions. If you bait fish for catch-and-release, circle hooks are worth trying.
Fly hooks: Usually barbless (often required) and single-pointed. Typically the easiest to remove — a gentle twist pops them free.