You Only Need 3 Knots
There are hundreds of fishing knots. You need three. These three knots handle 95% of freshwater fishing in Canada — tying hooks, attaching lures, and connecting spoons. Learn them once, practice each 5 times, and you're set for every trip.
1. Improved Clinch Knot — For tying hooks and small lures. The most-used knot in fishing.
2. Palomar Knot — For tying lures and jigs. Stronger than the Clinch, slightly harder to tie.
3. Loop Knot — For spoons and crankbaits that need free movement. The "let it swim" knot.
That's it. Master these three and you can fish anywhere in Canada with any tackle. Everything else is a speciality knot you'll learn when (and if) you need it.
Knot #1 — The Improved Clinch Knot (Your Daily Driver)

Use for: Tying hooks, small jigs, swivels, and flies to your line. This is the knot you'll tie most often.
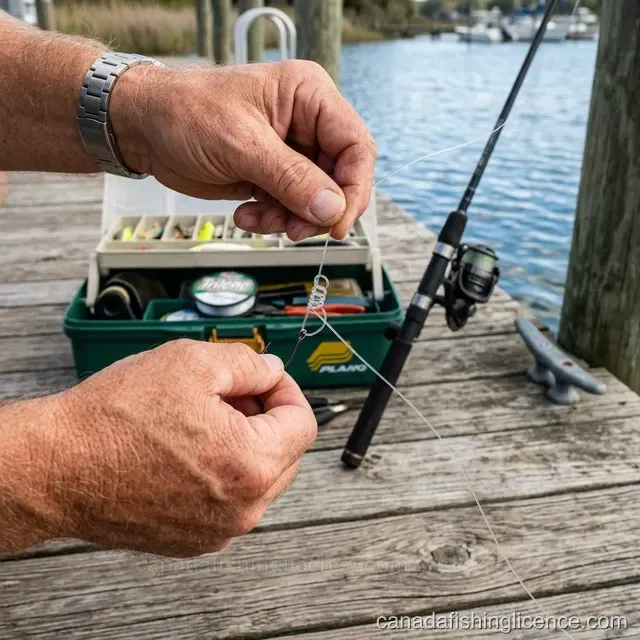
Step 1: Thread 6 inches of line through the eye of the hook (the small metal loop at the top of the hook).
Step 2: Hold the hook in one hand. With the other hand, twist the free end of the line around the main line 5 times. The twists should be neat spirals, not tangles.
Step 3: Take the free end and pass it through the small loop that formed just above the hook eye (where the twists start).
Step 4: Now pass the free end through the big loop you just created. This is the "improved" part — it locks the knot.
Step 5: Wet the knot with saliva (this reduces friction and heat that weakens the line). Pull the main line slowly to tighten. The coils should stack neatly against the hook eye. Trim the excess to about 2mm.
Common mistake: Not wetting the knot before tightening. Dry monofilament generates friction heat when tightened, which weakens the line by up to 50%. One lick solves it.
Strength: About 85% of line strength when tied correctly. More than enough for any freshwater fish in Canada.
Knot #2 — The Palomar Knot (The Strong One)
Good for: Tying lures, jigs, and hooks when you want maximum strength. Many tournament anglers rely on it as their only knot.
Step 1: Double about 6 inches of line to form a loop. Pass the doubled line (the loop) through the hook eye. You now have a loop on one side and two tag ends on the other.
Step 2: Tie a simple overhand knot with the doubled line — the same knot you'd tie to start tying your shoes. Don't tighten it yet. The hook should be hanging freely below the loose knot.
Step 3: Take the loop end and pass it completely over the hook (or lure). Pull the loop past the hook so it sits on the line above the eye.
Step 4: Wet the knot. Pull both the main line and the tag end simultaneously to tighten. The knot should cinch down neatly on the hook eye.
Step 5: Trim the tag end to 2mm.
Common mistake: Using too little line for the initial loop. If the loop is too short, it won't pass over the entire lure/hook in Step 3. Start with more line than you think you need.
Strength: About 95% of line strength — one of the strongest knots in fishing. It's harder to mess up than the Clinch Knot because there's less to go wrong.
Knot #3 — The Loop Knot (The Freedom Knot)
Use for: Spoons, crankbaits, swimbaits, and any lure that needs to swing freely. Unlike the Clinch and Palomar (which cinch tight to the eye), the Loop Knot creates a small loop that lets the lure move naturally.
Step 1: Tie a simple overhand knot in the line about 6 inches from the end. Don't tighten it — leave it loose.
Step 2: Thread the tag end through the hook/lure eye.
Step 3: Pass the tag end back through the same side of the overhand knot it came out of. Now you have line going through the eye with a loose overhand knot between the eye and the main line.
Step 4: Wrap the tag end around the main line 3 times (above the overhand knot).
Step 5: Pass the tag end back through the overhand knot (entering from the same side as before).
Step 6: Wet the knot. Pull the tag end to snug the wraps, then pull the main line to tighten the overhand knot. You should have a small loop between the knot and the lure eye — this is what gives the lure its freedom of movement.
Common mistake: Making the loop too big. A loop of 5-8mm is ideal — enough for the lure to swing, but not so big that it catches on things.
Strength: About 80% of line strength. Slightly weaker than the other two, but the free movement makes lures dramatically more effective.
Which Knot for Which Situation?
Here's the simple decision tree:
Tying a hook for bait fishing? → Improved Clinch. Quick, reliable, good enough for any fish.
Tying a jig for ice fishing? → Palomar. Strongest knot, easy with cold fingers, works great with small jigs.
Tying a lure that needs to swim naturally? → Loop Knot. Spoons, crankbaits, and swimbaits all perform better with a loop.
Not sure? → Use the Improved Clinch. It works for literally everything. The other two are optimizations, not requirements.
Braided line? → The Palomar is best with braid because the doubled line grips better. The Improved Clinch can slip with braid unless you do 7+ wraps instead of 5.
Practice Tips — 5 Minutes to Confidence
Don't practice these for the first time on the water. Spend 5 minutes at home:
Use a large hook or a key ring tied to a chair leg. Heavy rope or paracord is easier to learn with than thin fishing line — you can see what the knot is doing.
Tie each knot 5 times. By the third attempt, you'll remember the steps. By the fifth, it'll feel natural. Total practice time: about 5 minutes per knot.
Then try with real fishing line. Use 8-10 lb monofilament and a real hook (clip the point with pliers for safety). The muscle memory from the practice transfers immediately.
On the water: If you forget a step, search "[knot name] fishing" on YouTube. There are 100+ tutorials for each knot, and lake-side videos are 60 seconds long. This is the one time checking your phone while fishing is totally acceptable.
When to Re-Tie Your Knot
A good knot can last all day, but re-tie in these situations:
After catching a big fish. The fight stresses the knot. Re-tie to be safe.
If you ran the line over rocks or stumps. Abrasion weakens monofilament. Cut back 2 feet and re-tie.
If the knot looks messy. If the coils overlapped, the knot didn't seat properly, or there's a visible kink — cut it and start over. A 30-second re-tie is cheaper than losing the fish of the day.
At the start of each trip. Line exposed to UV light degrades over time. Cut the last 3-4 feet and re-tie fresh.
Any time you feel uncertain. If you're wondering "is this knot okay?" — it's not. Re-tie. The few minutes it takes are always worth it.